Mousetrap made from a plastic bottle
The material is accessible, easy to process, and most importantly, it produces a humane mousetrap.
The rodent remains alive, which can be important for a certain circle of people. Some people simply want to get rid of pests without killing them, while others specifically catch them to feed predatory animals. From the rich assortment, we will consider the three most popular models offered by craftsmen: The bottle is cut across closer to the neck, but not all the way. It looks like a hinged lid. A locking mechanism is being made. Transverse elements, such as wooden cooking skewers, are inserted from both cut edges. At the exit, they are tightened with an elastic band for money. The result is a structure that tends to close. A cord is attached to the neck, which pulls the upper part. Its other end in the form of a loop is attached to the bait holder. You can use a toothpick. The homemade mousetrap is ready for use. When the mouse grabs the prepared tasty morsel, the loop flies off the holder and, due to the elastic bands, the bottle collapses, and the rodent remains inside.
A hole is made in the roof and bottom. Any suitable rod is inserted into it. This creates the axis of rotation. A simple design is placed above a bucket, to which a board or other suitable object is placed. This will be the mouse approach. The principle of operation is as follows: the rodent will rise to a bottle that has been pre-treated with a product attractive to the pest. When the mouse runs onto the bottle, the simple design flips over. The animal falls into a bucket, from which it will not be possible to get out on its own.
Another simple way is to use the see-saw principle. The bottle is pierced with wire approximately in the middle. The axis of rotation is made with the expectation that the structure is installed above the support by 1-2 cm. On the side of the neck, a block is fixed end-to-end, which is the approach to the hole. The mouse calmly gets inside to the bait. When you try to get back out, the neck lowers under the influence of gravity, and a pre-fixed block blocks the way.
The neck of the bottle is cut off. A hole is made at the edge and a cord is tied, the length of which is determined experimentally. The other end is tied to a support or weight, with the expectation that if a mouse hits the bottle, it will remain in a hanging position. The device is placed on elevated places, for example on a table, shelves, window sills so that the center of gravity is as close to the edge as possible. The bait is placed on the bottom. When the pest tries to get to it, the structure falls from the support and hangs on the cord in a vertical position before reaching the floor.
Any of the above methods is effective. Adjustments can be made to the design based on the materials at hand. Only the principle of how to make a mousetrap with your own hands is proposed, and the details of a specific design may have features.
Water Bucket Trap
This option for catching mice makes it easier for you to get rid of them. The mice will drown in the bucket and you will only have to dispose of them. See below how to make such a structure from a couple of lemonade cans, wire and a bucket.
| Illustration | Description of action |
| You need to punch two holes in the center of the jars. This can be done with an awl or a regular nail. | |
| Select a piece of steel wire larger than the diameter of the bucket | |
| Punch two holes not high from the edge and thread the wire through them | |
| Place lemonade cans on wire | |
| Place the bucket in a place where you often see mice and make a small board ladder to it | |
| Fill a bucket a third of the volume with water, and place a fragrant bait on the edge of the jar. |
Harm from mice
These pests need to be controlled for several reasons. Firstly, many people are afraid of mice, especially housewives. When mice appear, they panic. In addition, there are a number of factors that are decisive. For example:
- Damage to household items. They were called rodents for good reason, since they are capable of chewing objects in the house, regardless of the material they are made of. This could be furniture, electrical wires, children's toys, shoes, etc. They especially love foam. If someone has made a renovation and used polystyrene foam as insulation, then you need to be prepared to receive such pests.
- Possibility of fire. Mice can easily eat the insulation of electrical wires, which can ultimately lead to a short circuit and fire. They can chew the power wires of many electrical appliances, so you need to regularly inspect them to ensure the integrity of the insulation.
- Presence of pathogenic microorganisms. The saliva of rodents can contain various microorganisms that can cause typhoid, cholera, plague or ordinary poisoning. In addition, mice are carriers of fleas, which prefer to feed on human blood.
- Rodents spoil food and water. This happens because mice everywhere leave traces of their vital activity in the form of feces, which are saturated with bacteria and viruses. If an animal drinks water from a cup, it can be hazardous to health.
- Mice leave behind an unpleasant odor. This is a kind of “mouse” smell, which is distinguished by its peculiarity. It is by this that you can determine that there are mice in the house. If it gets absorbed into furniture or some things, it is quite difficult to get rid of it. Some people may experience allergy attacks, which are expressed in the form of vomiting. In any case, this leads to constant discomfort.
Therefore, we can safely say that rodents cause significant harm, depriving a person of peace and comfort.
How to make mouse traps with your own hands
Homemade mousetraps made from plastic bottles are the simplest, but not the only way to get rid of night noises, unpleasant odors, and a continuous feeling of disgust. No special devices, tools, or equipment are required for the manufacture. The maximum you need to have on hand is a PET bottle or jar, a knife, and thread. Naturally, prepare bait. It doesn't have to be kneaded. Just crumble everything listed above, and the mice will come out of their shelter as soon as the house is quiet.
Mouse trap from a jar
A regular half-liter or liter glass jar will do. Well, another coin worth 2 or 5 rubles. A mousetrap from a jar is made as follows:
- Place some bait mixture on the table or floor.
- Cover it with a jar so that there is nothing extra outside.
- Place the neck on the edge of the coin and wait.
The design is unstable, but that's what's good. The rodent, wanting to get a treat, climbs into the jar, touches a coin, which immediately falls. Now the mouse is a hostage. Nothing will happen to her, especially since there is something to eat there. A similar structure can be made from a bucket or any other container. The main thing is to lay a piece of linoleum, plywood, etc. under it. This is necessary to take the prisoner out into the garden or wasteland and simply release him.
Bottle trap
At the dacha, in the pantry or in the garage there will always be a plastic bottle, which will be a mousetrap, which can always be made at home. To make it, do the following:
- A mouse trap made from a plastic bottle will work if you wash the container first. The pungent odor will overpower the aroma of the luring mixture, which will not be able to attract the victim.
- Take a sharp knife and make a side cut at the top near the neck. You should not burn or scorch, as the acrid smoke will cause the bait to become uninteresting.
- Tie a plastic bottle mouse trap to a stationary object on the table, and put some bait inside. Now install it so that the bottom is outside the table.
As soon as the mouse climbs inside and gets to the food, the container will fall and hang in a vertical position. The mouse won't be able to get out. All that remains is to take the trap and take it outside the site. Now it can be used more than once.
From a bucket and a bottle
In this case, in addition to a plastic bottle, you will need a bucket, tape, a board and a metal rod. This is perhaps the most interesting way to catch a mouse. The step-by-step instructions look like this:
- Make holes in the lid and bottom of the container.
- Thread the rod so that it coincides with the longitudinal axis and does not interfere with rotation.
- Fill half a bucket of water and place a rod on the sides.
- Tape the bait in the middle of the container.
- Install the board in the form of a kind of ramp.
The principle of operation of such a mousetrap made from a plastic bottle, assembled with your own hands, is simple. The rodent, smelling the smell of food, climbs to the edge of the bucket. Unable to reach, he tries to lean on the walls of the bottle, which rotates with the slightest effort. The mouse falls into a bucket of water, from where there is no way to get out. The only drawback of this method is the need to take the “prey out of the yard” in the morning.
Video: a simple and effective DIY mousetrap
To assemble a mousetrap from a plastic bottle with your own hands, it is better to use the advice of a professional. To do this, watch the video file, where you will be told in detail about the manufacturing process and the principle of operation. Do it together with the master, use his advice and recommendations. Make several different traps at once. Don't put in too much food. Its task is to lure with smell, but nothing more. You've already read the rest.
Of course, there are many ways to open the “mouse hunting season” on the Internet, but these three are the most popular and effective. The thing is that the materials are always at hand. No special skills required. There is no need to use mechanical means. Everything is designed for tricks. But most importantly, there is no need to kill a living creature, which you then simply release away from the house. Using these three methods, you not only get rid of parasites, but also do not harm nature.
We catch the pest alive in the house: quickly and inexpensively
There are several options to quickly catch a rat in the house with homemade devices. The most effective of them, which have been repeatedly tested in practice, are described below.
- Take a saucepan (or other available container), attach a piece of sausage, lard or bread with vegetable oil to the middle of its wall;
- The pan is turned upside down and placed on the floor;
- One edge of it is raised, and an unstable support is placed under it (for example, a nail or a jar lid on the edge). The edge of the pan rests against the support.
When a rat crawls under the pan for the bait, it is highly likely to push the support, and as a result, the pan will cover the rodent. Even if the rat is very careful and does not touch the support, the animal under the pan will rest its front paws on its wall to get the bait, and will still move the pan from the support.
Option 2 – allows you to catch a rat alive using an unstable bridge over a container:
- A stool is placed next to the empty open barrel, on which a small plank is placed, about half of which will hang over the neck of the barrel;
- The bait is placed at the very edge of this overhanging board.
- The rat will try to get to the bait, the board with it will tilt and fall into the barrel.
This principle will also work with a bucket, but the rat will be able to jump out of the bucket. Sometimes the animal manages to get out even from a ten-liter bucket half filled with water.
Option 3 – original trap made from a plastic bottle:
In addition to the free nature of the described traps, their beauty lies in their complete safety - neither pets nor children risk injury if they accidentally stumble upon such a device.
The main problem with a live trap is the need to decide what to do with the caught rat. It’s good if there is a cat or dog living in the house, which will gladly save the owner from this problem. If there is no such pet, then you will either have to kill the rat yourself (which not everyone can do), or spend time and effort to release it away from the house.
If you don’t want to do either one or the other, then you shouldn’t catch a rat alive.
An exception to this recommendation is when you need to catch a live escaped ornamental rat. In this situation, live traps are an ideal option.
It is also important to remember that a caught live rat may well bite until it bleeds if you try to pull it out of the trap with your bare hands or wearing thin gloves. Such bites are quite painful, and, in addition, when bitten, the animal can infect a person with a dangerous infection
Therefore, all manipulations with a triggered live trap should be carried out wearing thick construction gloves.
How to make a mousetrap with your own hands from wood
The simplest material for making mousetraps is wood; here you can use any wood waste, blocks and even plywood.
Variants of traps made of wood and metal wire
Trap made of board and wire with a spring
The main advantage of a trap with a spring is that it can be used many times. You can always make several traps and place them along the path of rodents to be sure to get rid of mice.
If you look closely, making such a trap with your own hands is quite simple.
What you need to prepare for work
To make a simple trap we will need:
- block 10×5×15 cm (dimensions can be arbitrary);
- drill;
- thin drill;
- spring;
- thin wire;
- mouse bait.
You can make a spring with your own hands; for this you will need 45 cm of wire with a thickness of 1.5-2.5 mm
Step-by-step instructions for making a trap
Making such a trap is quite simple; step-by-step instructions will help us with this.
- Drill two holes in the end of the block.
- Insert a small piece of wire into them and secure it on the reverse side. A loop should remain on the surface.
- Drill two more holes on the sides and make similar wire loops.
- Secure a metal frame with a spring; a hook or spatula for bait must be fixed on it.
- Attach the hook to the clamp.
One of the schemes for making a reusable mousetrap
When the mouse tries to remove the bait, the latch will work and the spring will pin the rodent to the bar
How to make a mousetrap for several holes from timber
A trap with a large number of cells is much more effective than a conventional trap intended for one rodent. It’s enough to make a few pieces and you can safely leave your home. During the absence of the owners, all the mice will be inside.
What you need for work
To make a trap for several minks, we will need the following materials:
- wooden block 5×5 cm². The length depends on the number of holes;
- metal wire;
- spool of thread.
Master class on making your own mousetraps with several cells
To make a burlap for several minks correctly, let's look at the whole process in more detail.
| Illustration | Description of action |
| On a sanded block, mark the distance of future burrows with a diameter of 3 cm at a distance of 1.5 cm from the edge; the distance between them should be about 1-1.5 cm. | |
| Drill blind holes. | |
| Use a milling cutter to make a cut on the side where the holes are located. | |
| Insert small splinters into the slot between the holes. | |
| Install metal brackets. | |
| Draw a line from the center of each hole and, at a distance of 1 cm to the right and left of it, drill holes with a thin drill in the center of the block. | |
| From the opposite edge, drill holes in the center of each line. | |
| Make springs of 1-2 turns and retaining rings from metal wire. | |
| Insert the springs with rings into the holes. | |
| Tie a thread to each spring, pull it through the holes and fix it at the bottom of the board so that the ring is in the slot. | |
| The thread will be exactly in the center of the hole. | |
| Place bait inside the holes. Trying to get to the food, the mouse will gnaw through the thread and end up trapped in a ring. |
You can watch the whole process in more detail on the video: https://www.youtube.com/watch?v=TwPagOdgxeY
Mousetrap made of plywood and springs
It is very easy to assemble a plywood trap. To do this, you will need a piece of plywood 15 cm long and 10 cm wide, a frame made of solid wire and a tight spring. The bait is attached to a hook so that the rodent has to pull on it. Then a spring will work, which will slam the metal frame. This is a classic mousetrap model, and here is an example diagram:
Classic plywood trap PHOTO: nemaloknig.com
How to catch a mouse
To check whether there really are mice in the house, you just need to sprinkle a little flour in the “suspicious” areas where the animals supposedly live, and see if traces appear the next morning. Depending on your personal preferences, you can choose different methods of catching mice - from harmless to quite cruel. It should be kept in mind that these rodents rarely leave their nests during the day, so you need to set traps at night.
A mouse is dangerous to humans because it can cause a dangerous infection, especially if it gets into food
Killer Mousetrap
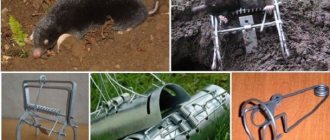
An old, tried and true, but not always effective way to catch a mouse is to use a mousetrap. The latter can be industrially manufactured and vary in design. The principle of operation of such a device is to lure a rodent and then kill or injure it through a special mechanism.
Table: traps that kill rodents
| Traps made of steel and (or) wood | A reliable and proven product that often kills the pest outright. You can use lard, raisins, peanut butter, and smoked meats as bait. |
| Mouse traps | Better and more reliable than similar mechanisms made of wood and metal, due to greater efficiency, less risk of injury to humans, simplified design and versatility. |
| Mousetrap | A simple but not very effective design. The principle of operation is to lure the animal and suffocate it with a steel loop. |
| Electric mousetrap | The principle of operation is based on luring and shocking a rodent with an electric current. A relatively humane tool for killing mice. |
Photo gallery: types of mousetraps
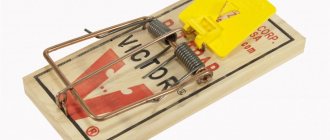
A classic mousetrap consists of a wooden plank and a metal spring.
On sale you can find an improved version of the classic mousetrap
Electric mouse trap electrocutes mice
Humane traps
Not everyone will enjoy killing or maiming a living creature, even a very harmful one. Manufacturers specializing in the production of rat and mouse traps have developed a large number of humane mouse traps that do not harm animals. As a rule, the operating principle of such products is based on luring the animal using bait into a cage (box, container) with an automatically closing door. The caught troublemaker can then be released. It is recommended to do this at least one kilometer from home.
A mouse caught in a cage mousetrap remains alive
Table: traps that do not harm the animal
| Live traps of various types | A very simple but effective type of mouse trap that can be used repeatedly. They are safe for both rodents and people. It is recommended to use chocolate, seeds, bread with sunflower oil as bait. |
| Mousetrap cage | It is hygienic and humane, but less safe for people compared to modern live traps due to the presence of a trigger mechanism. Sometimes false positives may occur. |
DIY mousetrap made of wood
This wooden mousetrap can be made with your own hands in just 15-20 minutes, but this model is the most complex. It is possible to install several traps at once, which will be located on one block.
Dimensions will be given for one trap. If you want to increase their number, then simply lengthen the bar several times.
A block with a cross-section of 5 x 10 cm is drilled to a depth of 8 cm using a ø25 mm feather drill.
Let's call this hole a “mink”. A cut is made along the block, 3-4 mm wide.
Step 3
Three thin holes with a diameter of 2-3 mm are drilled, which should be located perpendicular to the axis of the “mink”. In this case, the first hole is located in the longitudinal cut. The second hole is made approximately in the middle of the length of the “mink”. The third hole is made outside the boundaries of the “mink”.
Step 4
A ring with an eye with a diameter of ≈ 3 cm is made from iron wire. Weave a three-turn spring from elastic steel wire. The free ends of the spring should be 8-10 cm long.
Step 5
Make a three-turn spring from elastic steel wire. The free ends of the spring should be 8-10 cm long. Opposite the eyelet, a strong thread is tied to the ring. For ease of work, thread the free end of the thread into a shoemaker's (gypsy) needle.
Step 6
The thread is sequentially threaded first into the first hole (through the cut). Then from below into the second hole and the free end is fixed with tension by the peg
Please note that the ring should sink into the cut so as not to reduce the clearance of the hole
The spring is inserted at one end into the third hole, and its other end is threaded through the ear of the ring.
Step 8
Several sunflower seeds are poured inside the “mink”. A hand-made wooden mousetrap is ready for use and is in a cocked state.
The principle of its operation is as follows. The mouse crawls into the hole, smelling the smell of seeds. But her way is blocked by a thread that holds the ring tensioned by a spring. The mouse easily chews the thread, and immediately finds itself pressed under the ring.
Electronic mousetrap
This type of mousetrap can be made by anyone with minimal knowledge of electrical engineering. There are 2 types of such mousetraps.
- Mousetrap cage. After a rodent, attracted by the smell of the bait, enters the cage, the trap door slams shut, the contacts located on the wall and the door are connected - the electrical circuit is closed and a signal sounds that the trap has worked.
- Killer mousetraps. In such devices, current is supplied to a metal plate installed at the bottom of the trap, as well as to the parts on which the bait is attached, or to parts that are placed on the path to the bait and which will definitely be touched by the animal making its way to the prey. The current passing through the body of the rodent that has closed the circuit kills it.
Making a trap
There are a huge number of different ways to deal with mice. The most common ones are based on toxic substances and sticky surfaces. However, such methods are not suitable for those who have pets in the house. In addition, they all require financial investments and time to search for a store.
Therefore, I want to offer a simple but quite effective solution in the form of a plastic bottle trap. The device is made from scrap materials, without special tools or knowledge.
Provided you have everything you need at hand, the creation process will take no more than 1 hour.
Principle of operation
The mechanism operates on the principle of a trap and locks the rodent in a bottle until we rescue it. This happens as follows:
- The mouse climbs into the bottle through the neck in the hope of getting food, which is located near the far wall;
- Runs through the entire bottle and eats the bait;
- In an attempt to return, he runs to the neck, but the bottle smoothly lowers and blocks the escape route.
No matter how much the rodent rushes about, it will not be able to get out.
Process of creation
As I wrote above, the entire creation process will not take you more than an hour. You'll need:
- 1.5 liter plastic bottle;
- A plank for the base about 30 cm long;
- 3 short pieces of timber;
- Knitting needle or scraps of thick wire;
- “Pillars” on which the knitting needle will be held. These can be wooden blocks or metal loops, as in our case.
The only tools we need are an awl, a hammer and nails.
- We take a plastic bottle, mark the center and make a through hole so that a knitting needle can be threaded through it;
- Next, we take the base and screw (nail) the spoke supports to it;
- We install our bottle. If everything is done correctly, the bottle should balance;
- Now we take two bars and nail them to the base so that the bottle is in a horizontal position. (The block near the bottom should touch the bottle, but the block near the neck should not).
- We nail an obstacle board to the side of the timber located under the neck. It is she who will detain our prisoner in the bottle.
That's it, the trap is ready. Check the mechanism several times. When tilting, the neck should be tightly covered with the board.
Trap at work
The rodent runs into the bottle and runs to the very end of the trap to feast on the treat.
After the bait is eaten, the mouse will hasten to return and run to the neck. But as soon as the animal crosses the center, the bottle will tip over and the entrance will be blocked by a board.
That's all, the rodent has been caught. Now all that remains is to remove the bottle from the trap and take the prisoner to the nearby forest.
I recently started groups on Odnoklassniki, where I post announcements of new materials every day.
Bank and coin
To build a trap, take a base (a book, a wooden or metal plate), a half-liter jar, a coin (50 kopecks) and a treat. Place the prepared base where mice often appear, place the bait on top and cover it with a jar.
Now carefully fix the coin between the neck of the jar and the base. The resulting space is quite enough for a mouse to get through when it comes to the smell of the bait.
When the rodent is trapped, it will definitely touch the coin with its tail, and the jar will fall on top of it. All you have to do is turn the container over and take the uninvited guest out of the house.
But such a mousetrap has one drawback: when it slams shut, the rodent will have virtually no air. Therefore, it is better to place the trap on a board or piece of iron to hear the noise.


